

Introduction to Drawing a Butterfly
Drawing a butterfly may seem complex at first, but by breaking the process down into simple steps, even beginners can create a beautiful illustration. The art of butterfly drawing relies on understanding basic shapes and being able to put them together in a harmonious way.
In this article, we'll explore how to draw a butterfly easily, step by step, incorporating simple geometry principles.
Exploring the Basic Steps for Drawing a Butterfly
Drawing a butterfly can be an enriching experience, allowing you to explore the natural beauty and complexity of these creatures through art. This article details each step of the process, offering tips for incorporating SEO keywords throughout your learning to draw butterflies.
Getting started with Simple Shapes
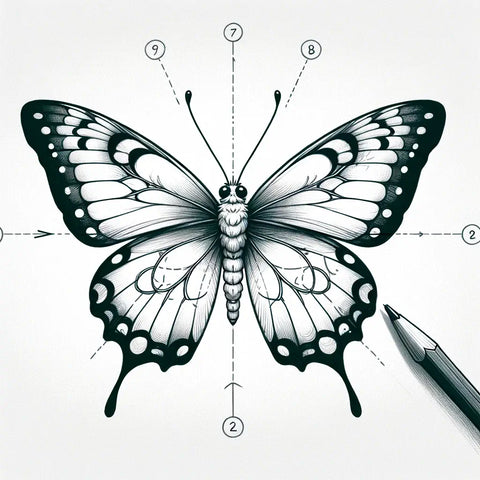
The first step to drawing a butterfly begins with simplifying its shape into basic elements. Start by drawing the butterfly's body as a small rectangle or oval to represent the thorax and abdomen. This initial approach is crucial to laying the foundation for your design.
-
Step 1: Butterfly Body
Start by sketching the central body of the butterfly. Use a light pencil to draw a small oval that will serve as a guide for the butterfly's thorax and abdomen.
-
Step 2: Upper Wings
Draw two broad curves extending from the upper body to form the upper wings. These curves should be symmetrical and extend outward, rising slightly before dropping back down.

-
Step 3: Lower Wings
Below the upper wings, draw two smaller lower wings with a more rounded or oval shape, making sure to maintain symmetry in relation to the central axis of the body.
Incorporate Wing Details
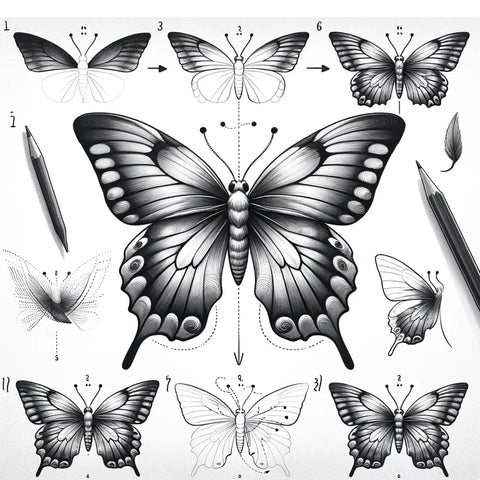
With the basic structure in place, the next challenge is adding details to the wings. Patterns on butterfly wings can be incredibly diverse, ranging from simple colored spots to complex, symmetrical designs.
-
Step 4: Wing Patterns
Add designs to the wings, starting with simple geometric shapes or lines. Think about symmetry when adding these details to reflect the two-sided nature of butterfly wing designs.

-
Step 5: Refine the Details
Use a thinner pencil or sharper tip to add finer details, like wing veins and small patterns that give the butterfly its unique look.
-
Step 6: Add Texture
Butterfly wings have a fine texture due to their microscopic scales. Light strokes of pencil can simulate this texture, adding a realistic dimension to your drawing.

Finalize with Color and Shadows
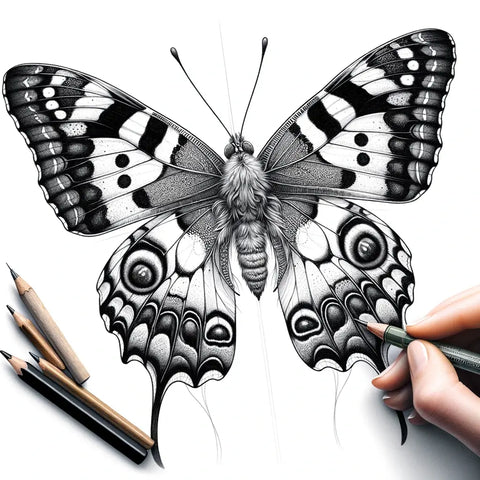
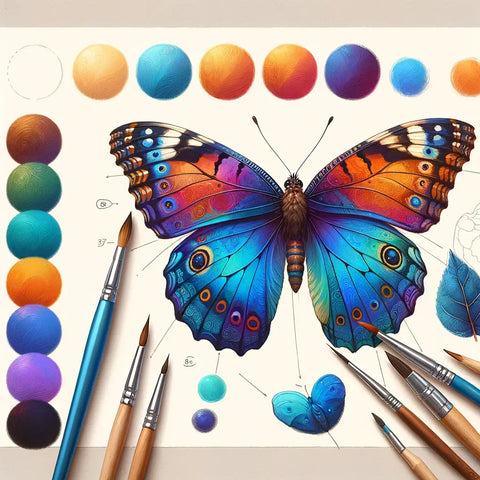
The final phase of drawing a butterfly involves adding color and shading to bring your drawing to life. This involves choosing colors that reflect those of a real butterfly or using your creativity for more artistic interpretations.
-
Step 7: Color Selection
Select colors based on the type of butterfly you are drawing. Apply a light first coat of color, then gradually build up the shades to add depth.
-
Step 8: Applying Shadows
Add shadows under the wings and around the body to give a sense of three-dimensionality. The shadows help anchor the butterfly in its surroundings, adding a more realistic effect.
-
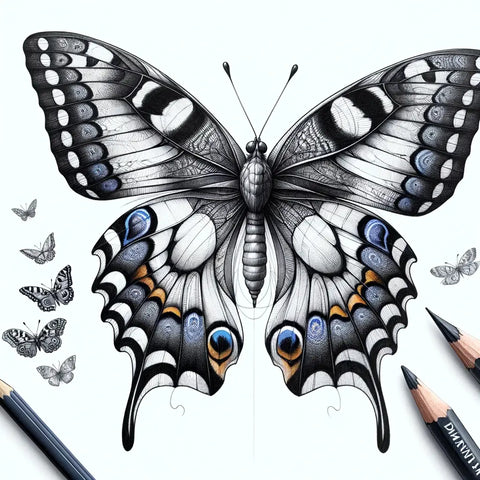
Step 9: Final Details
Finally, review your drawing to add final details or adjust colors. Use a white pencil or eraser to add highlights and give shine to the brightest parts of the wings.


Tips to Improve Your Technique
- Practice Symmetry: Symmetry is essential in drawing butterflies. Practice drawing symmetrical patterns to improve your ability to create balanced wings.
- Study Real Butterflies: Observing real butterflies or detailed images can help you understand their structure and patterns, thereby enriching your drawings.
- Experiment with Colors: Feel free to experiment with different color palettes to explore various artistic interpretations of butterflies.
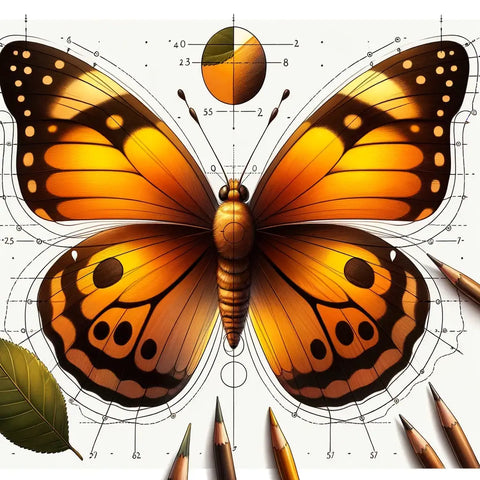
Understanding the Basic Structure
The first step is to grasp the basic structure of a butterfly, which relies on symmetry. Imagine a vertical line down the center of your page, this line will serve as a guide to ensure that both sides of the butterfly are symmetrical.
A butterfly's wings are basically made up of two main shapes on each side: a large one for the upper wing and a smaller one for the lower wing.
Sketch the Outlines of the Wings
Start by lightly outlining the upper and lower wings using simplified geometric shapes. Think of the upper wings as large rounded triangles and the lower wings as more oval or triangular shapes, depending on the species you want to draw.
Using rectangles and triangles as guides can help define the proportions and angles of these shapes before rounding and styling them.
Add Details and Symmetry
Once the general outline is in place, start adding details such as the designs on the wings. These patterns can vary greatly, but they generally follow lines of symmetry that emanate from the butterfly's body. Use light lines to sketch these designs, remembering that symmetry is key.
For beginners, it may be helpful to further divide the wings into smaller sections to simplify drawing the patterns.
Geometric Drawing Techniques
Geometric drawing can greatly simplify the process of creating a butterfly by breaking down its complex shape into simpler elements. This is not only limited to the use of basic shapes but also includes the application of geometric principles to ensure precision and harmony in your design.
Using Geometric Shapes
Basic geometric shapes such as circles, ovals and triangles can be used to construct the different parts of the butterfly. For example, start by drawing an oval for the body and use semicircles or rounded triangular shapes for the wings. These shapes serve as a foundation upon which you can build and refine details.
Application of the Right Angle Theorem
To ensure the wings are oriented correctly, you can apply the right angle theorem to verify that the top and bottom wings meet at an appropriate angle. This is especially useful for drawing the wings in a natural pose, where they are neither fully open nor closed.
Importance of Symmetry
Symmetry plays a crucial role in drawing butterflies, as their wings are almost always symmetrical. Use your initial vertical line as a guide to compare and adjust the two sides of the butterfly. For detailed designs on the wings, consider using a light grid to help maintain the symmetry of intricate designs.
Improved Drawing Techniques
Once you've mastered the basics of butterfly drawing, it's time to refine your technique to make your illustrations more lively and realistic. This includes using shading techniques, understanding texture and color, and adding fine details to bring depth to your drawing.
Shading and Texture Techniques
Shading is essential to give volume and depth to your butterfly. Observe how light interacts with a butterfly's real wings and try to replicate this effect with soft shadows and tonal transitions. The texture of the wings can be suggested by small pencil strokes that mimic the tiny wing scales.
Choice of Colors and Application
Color choice is crucial to capturing the beauty of a butterfly. Refer to photos for an accurate color palette or let your imagination run wild for more artistic creations. The application of color should be done in layers, starting with light tones and gradually increasing the intensity and saturation for more colored areas.
Add Fine Details
Final touches include adding fine details such as wing veins, antennae and eyes. These elements add a level of realism to your drawing. Use a sharp pencil or fine pen for these details to maintain accuracy.
By following these steps and tips, you will be well equipped to draw butterflies accurately and creatively. Whether you're a beginner or experienced artist, drawing butterflies provides a great opportunity to explore the natural beauty and complexity of these fascinating creatures.